You have your content safely exported, transformed by ZeroPress, and secured in a Private GitHub Repository. The final step to going live is deploying your new static site to the world. And the best part? It’s completely free, blazingly fast, and leverages an enterprise-grade global network.
In this guide, we will walk you through deploying your Jekyll site using Cloudflare Pages.
Why Cloudflare Pages?
Cloudflare runs one of the largest and fastest content delivery networks (CDN) in the world. When you deploy your site to Cloudflare Pages:
- Global Edge Network: Your HTML files are cached in hundreds of data centers globally. Visitors from Tokyo, London, or New York will load your site instantly from the server closest to them.
- Generous Free Tier: You can serve millions of visitors per month without paying a dime.
- Seamless Git Integration: Every time you push an update to your GitHub repository (e.g., adding a new blog post via Sveltia CMS), Cloudflare automatically rebuilds and deploys the changes in seconds.
- Built-in SSL: Free, unmetered HTTPS certificates are automatically generated and renewed for your domain.
Step 1: Connect your GitHub Account
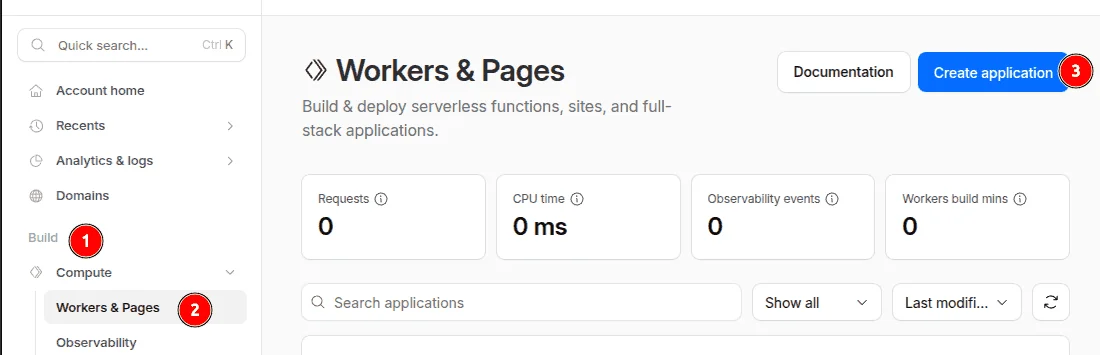
Log in to your Cloudflare Dashboard and navigate to Workers & Pages > Overview in the left sidebar.
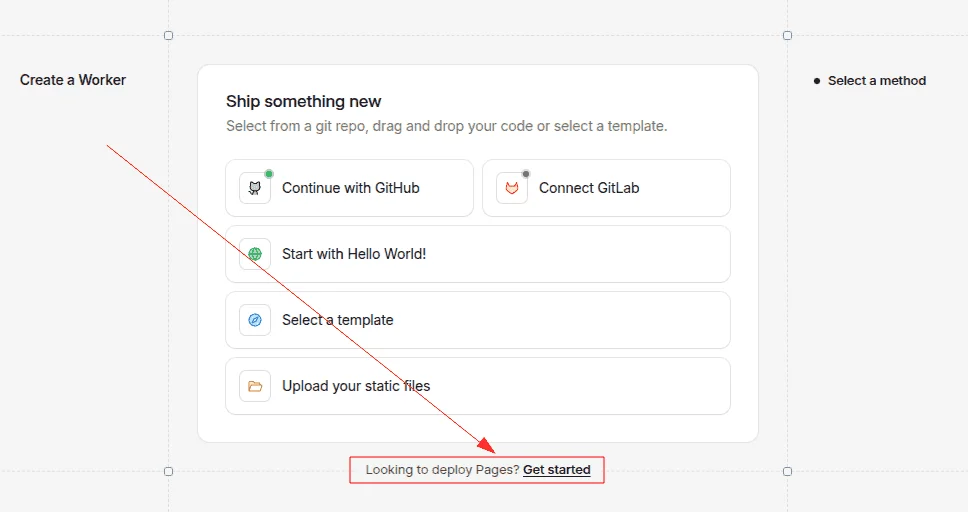
- Click the blue Create application button.
- Select the Pages tab.
- Choose Connect to Git.
Cloudflare will ask for permission to access your GitHub repositories. Choose to install it only on the specific private repository you created for your ZeroPress site.
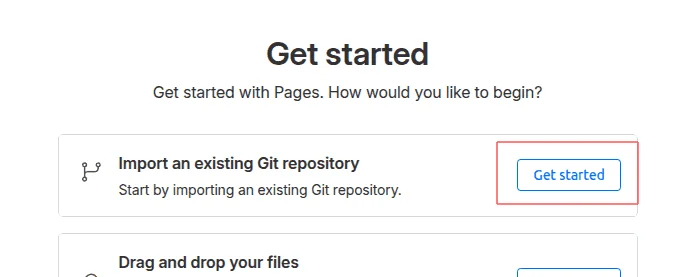
Step 2: Select Your Repository
Once authorized, select your repository from the list and click Begin setup.
Step 3: Configure Build Settings
This is the most critical part. You need to tell Cloudflare how to build your Jekyll site.
In the “Set up builds and deployments” section:
- Project name: This will become your temporary
pages.devsubdomain (e.g.,my-zeropress-blog). - Production branch: Usually
mainormaster. - Framework preset: Select Jekyll.
- Build command: Enter
bundle exec jekyll build - Build output directory: Enter
_site
Set the Ruby Version
Cloudflare Pages runs an older version of Ruby by default, which can cause build errors with newer Jekyll plugins. You must specify a newer version.
Scroll down to Environment variables and add a new row:
- Variable name:
RUBY_VERSION - Value:
3.2.2
Step 4: Save and Deploy
Click the Save and Deploy button.
Cloudflare will now clone your repository, install the necessary Ruby gems, build your Jekyll site, and distribute the resulting HTML files across its global CDN.
This initial build might take a minute or two. Once finished, you will see a success message and a link to your live, temporary domain (e.g., https://my-zeropress-blog.pages.dev).
What’s Next?
Your site is live! It’s incredibly fast, and it can’t be hacked.
Step 3: Setting Up a Custom Domain
Now that your site is live on a .pages.dev URL, you’ll probably want to connect it to your professional domain name.
Learn how in our Custom Domain Configuration Guide.